Screenshots – WP Simple Login Security
The following WP Simple Login Security screenshots demonstrate how easy it is to install and manage this security plugin.
Step #1: Unzip the Plugin download file and upload to your Plugins directory. Login to WordPress and ACTIVATE WP Simple Login Security. A menu item will appear in your dashboard.
This is only visible to the Administrator. Users will need to use the login process, but they CANNOT adjust these settings.
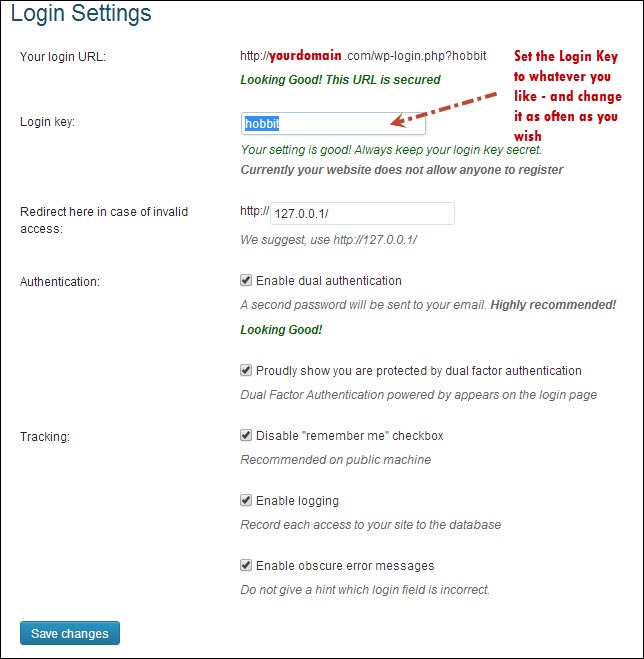
Step #2: Set up how you would like WP Simple Login Security to function for you. All settings are optional. Simply leave specific settings blank or un-check the functions which aren’t required.
At the top of the below screenshot, you will see the new login page URL address. The Login Key you select sets the page at which you will login.
Step #3: Logout and then login again using the new login URL address you set in the settings.
The following is Part 1 of the dual authorization process. Enter your Username…
(Note: All registered users should be advised of the new Login page. When you change the Login Key, you will need to notify them of the new URL or else they will be re-directed to http://127.0.0.1.
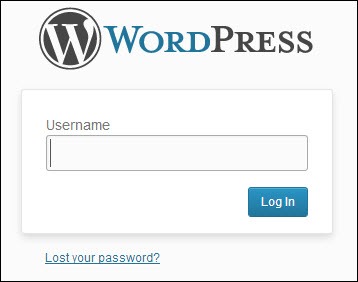
After you enter your Username, the screen will automatically refresh and take you to the next step:
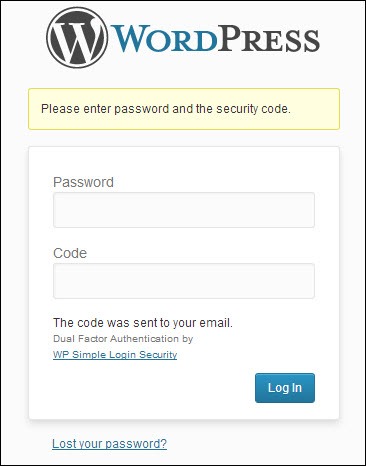
Step #4: Proceed with dual authorization. Check your registered email for this particular sessions authorization code.
All registered users (e.g. administrator and authors) will receive their authorization code in their email inbox.
Each code can only be used for one session.
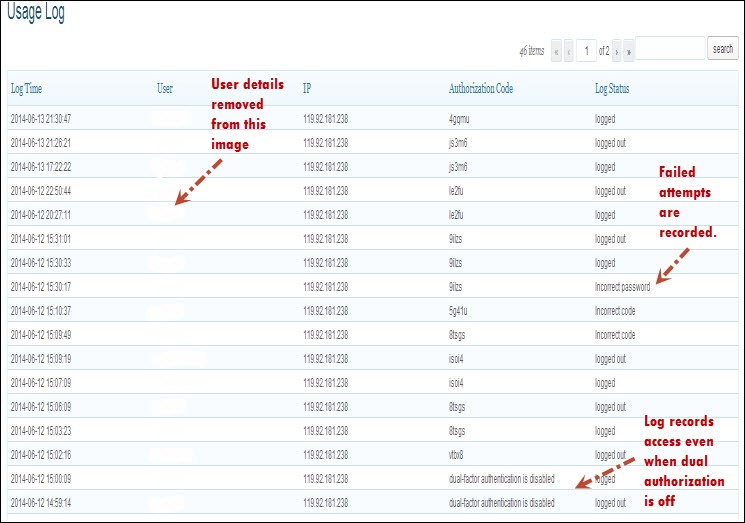
Step #5: Check the log file for details on access (we recommend you check this frequently to see if any malicious attempts have taken place.